Community-Game-Development-Toolkit
Adding a Scene Change
Scene changes let your player move from one scene to another as they pass through particular game objects. Any object (drawing, painting, diagram, photo cut-out) can function as a scene change object. Scene changes are the building block for creating interactive visual narrative using the Community Game Development Toolkit.
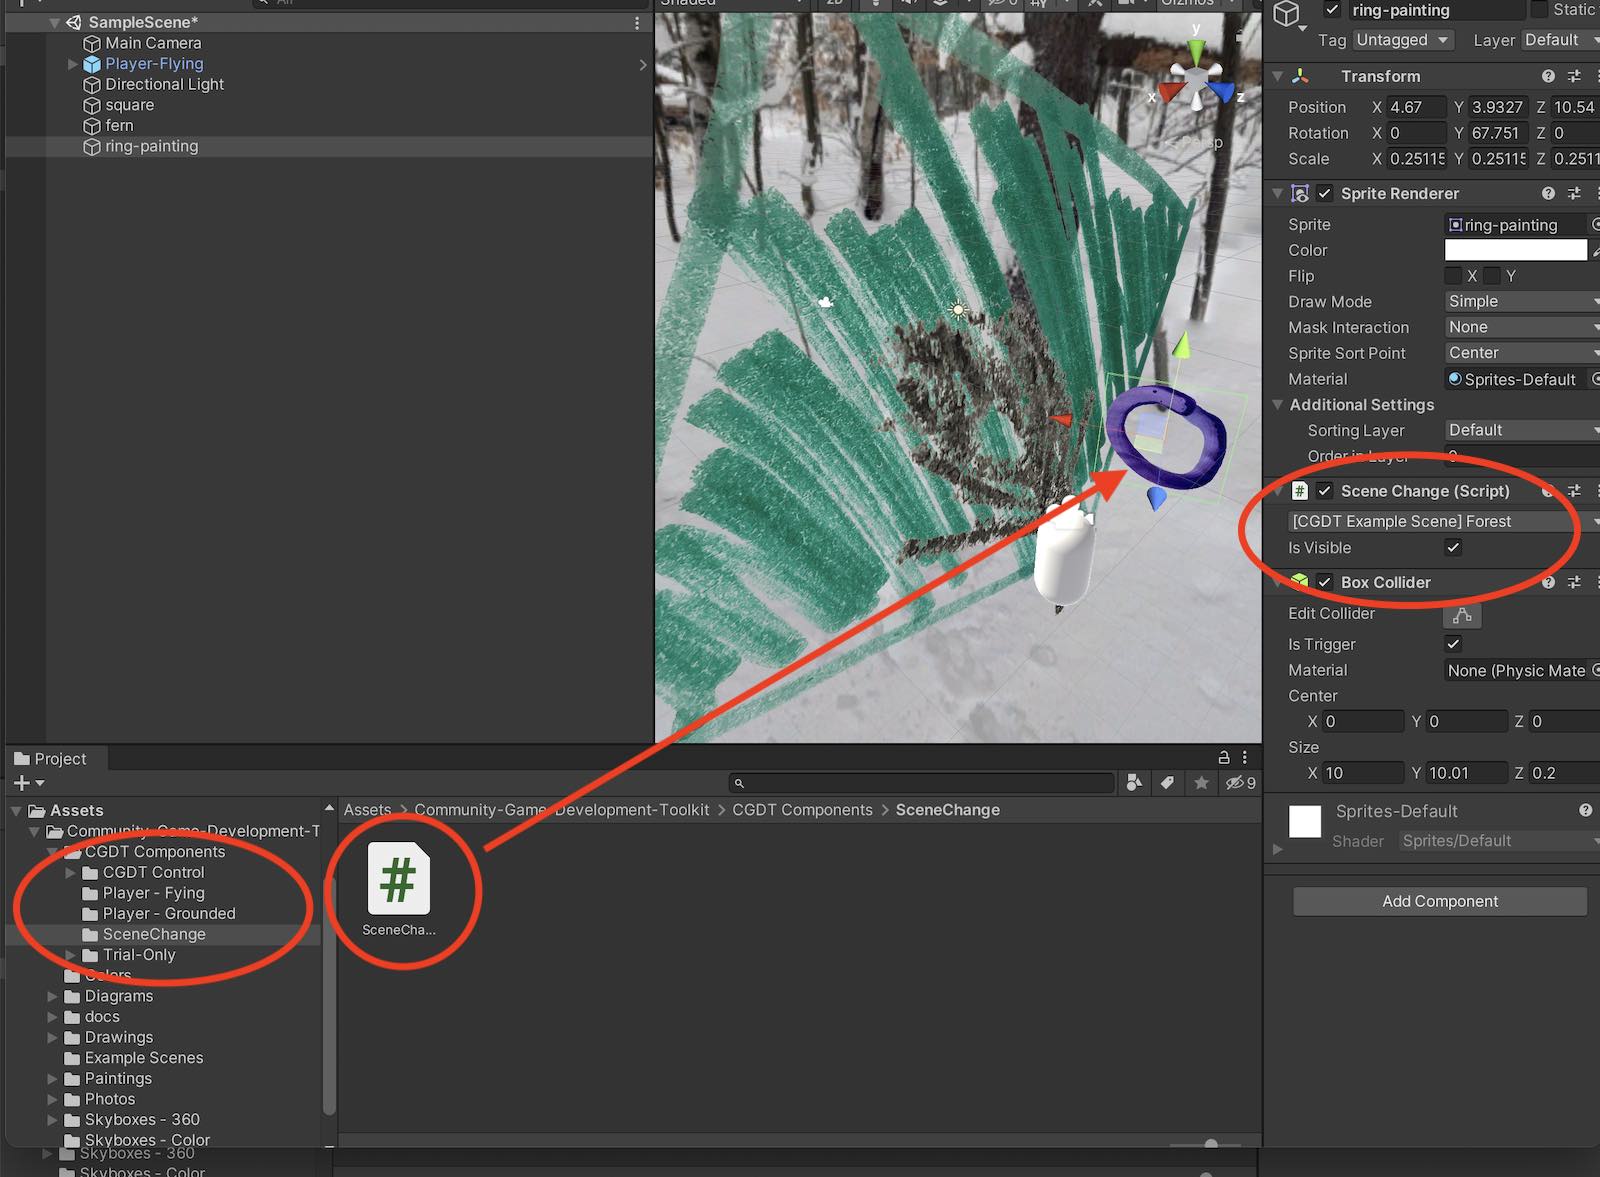
In this example we use the purple ring painting as a scene change object (because it looks vaguely like a portal – but it is up to you what a scene change should look like). We scaled-down the ring painting and positioned in front of other objects to make it noticable. But scale, location, size and appearance of a scene change object is up to you.

Instructions for creating a scene change:
- Make sure the object you want to turn into a scene change object is visible in the editor window.
- In the Projects tab, select the CGDT Components -> SceneChange folder
- Drag the SceneChange script to the desired object in the scene (in this example, the purple ring).
- Make sure you currectly added the script by checking that the scene change component shows up in the inspector (on the right) when the purple ring is selceted.

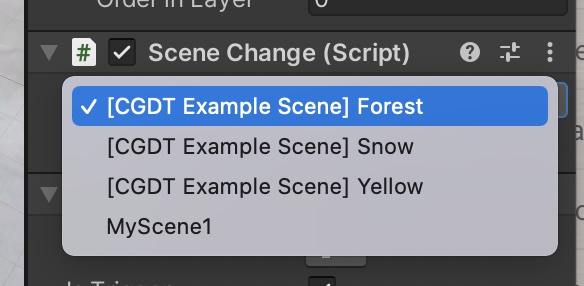
- Choose which scene you want your player to be transported to using the drop down menu (example scenes included in the toolkit are indicated with [CGDT Example Scene]. Here we’ve selected the example scene, Forest.
Test and play
- Play your scene – in this example, move the player through the purple ring and you will be transported to the Forest Scene.
- Make more new scenes, and add scene change objects that take the player from one scene to another!